
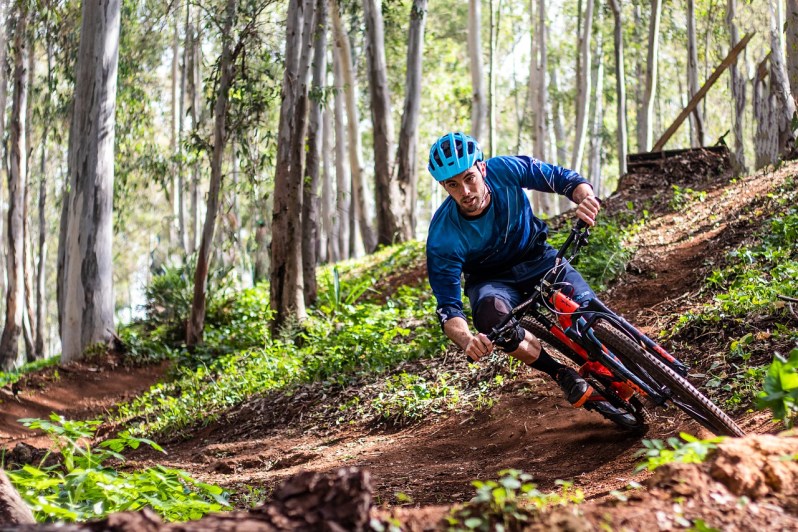
To consistently go fast on your mountain bike, you must have quality brakes. Having powerful bike brakes seems counterintuitive for building and maintaining speed, but it is true.
Going fast requires stopping your mountain bike quickly. Let’s say there is a tricky corner coming up that you know you will need to reduce speed for. If your mountain bike brakes are weak, you will likely need to begin stopping much earlier, reducing your overall speed. Stopping quicker means going faster.
It is also nice to have powerful mountain bike brakes in emergency situations, like late braking. Take that same scenario. If you didn’t know that corner was coming up, with weak brakes, you would likely miss the turn completely, going off the trail and crashing.
Mountain bike brakes are a common upgrade many consider when they purchase a mountain bike. Brakes are an area where bike companies look to save money, especially if you are buying an entry or mid-level mountain bike.
But what happens when you know you are riding high-quality mountain bike brakes and feel they are growing weaker? Try resurfacing your brakes before you throw money at new pads, a brake bleed, or just new brakes altogether.
How do you do that? Well, you came to the right place.
What you need and why resurface mountain bike brakes
A pervasive thing many of us experience mountain biking is fading brake performance. I’m not talking about bike brakes fading during a single descent—if that happens, perhaps you need to consider a new set.
I’m talking about gradually, over several rides, you’ve noticed that your mountain bike isn’t stopping the way it used to. Often, we replace the brake pads, which can solve the problem. But mountain bike brake pads aren’t cheap. You can expect to pay around $50 to get your mountain bike stopping again.
What happens with those old brake pads? Well, they are usually just tossed in the garbage. And rightfully so. The pads you just pulled out are likely nearly black, covered with dirt and grime.
This is the main reason you experience your mountain bike brakes fading—they are grimy and dirty. How did your bike brakes get that way? Well, one way this happens is simply by riding your bike. Mud, dirt, and dust are constantly hitting your bike rotors, being forced into the caliper, and sticking to the brake pads.
The other primary way it happens is by transporting our bikes. Having our mountain bikes on a bike rack behind our vehicle puts them in the perfect space to collect road grime from our car tires.
New brake pads will get you back to mountain biking, but those pads you just tossed likely have a lot of life left in them. Under that dirt and grime are excellent pads that just need a bit of resurfacing.
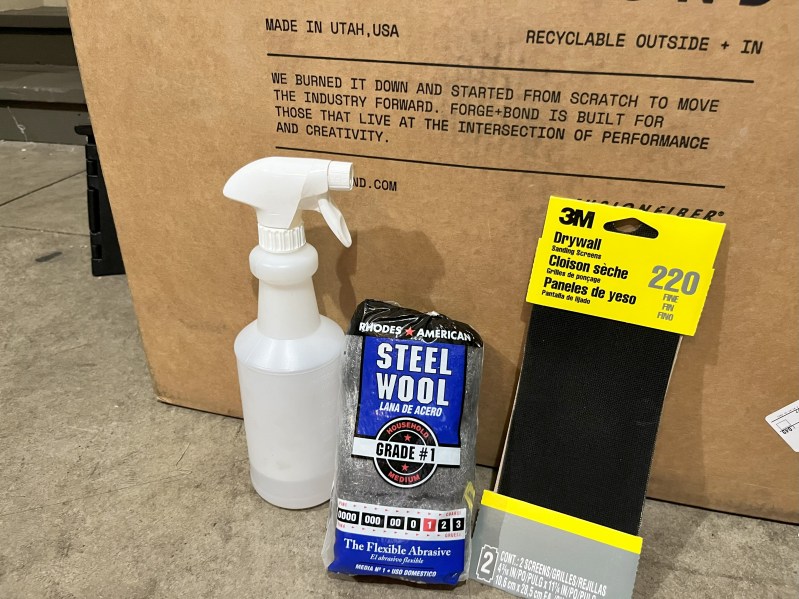
You only need three items to resurface your pads—steel wool, rubbing alcohol, and drywall sanding screens. You can find steel wool and sanding screens at hardware stores and rubbing alcohol at a grocery store. Buying these three items will set you back around $10.
How to resurface mountain bike brakes
- The first thing you will need to do is to remove the brake pads from the caliper. After you remove the front and rear wheels from your mountain bike, the pads will be held in by a screw and a spring. Remove the screw first, then pinch the pads together, compressing the screen to remove the pads.
- Take one of the sanding screens and place it on a flat surface. A sanding screen is recommended because it will allow dirt and grime to fall through the screen. Regular sandpaper can be used, but there comes a point where you will be rubbing the brake pad on dirty sandpaper.
- Rub the brake pad in a figure-eight motion on the sanding screen. Do this on different areas of the screen, not just in the same spot. You can also reverse the figure-eight motion and rotate the brake pads themselves. These small changes will help remove the most dirt and grime from the surface of your brake pads.
Removing the dirt and grime from the brake pad will return it to a metallic, nearly shiny surface. If it seems like a splotch of grime is left on the brake pad’s surface, I’ve got bad news: the pad is contaminated. Some oil or other contaminants got onto the pad and can’t be removed. Chain lube, tire sealant, and WD-40 are common culprits.
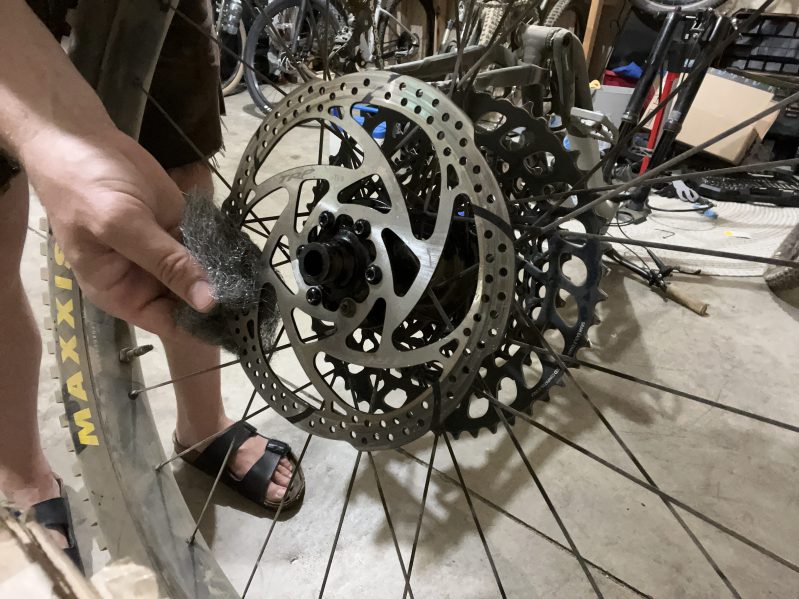
After resurfacing the brake pads, ensure your mountain bike brake rotors are clean.
- Put some rubbing alcohol into a spray bottle and spray the rotors.
- Get a piece of steel wool and give the rotors a bit of a scrub. This removes any dirt, grime, and oily contaminants from the rotors.
- Finally, wipe the rotor with a clean rag to remove any steel wool strands.
Resurfacing complete. Now, reverse the steps you followed to remove the brake pads. Pinch the brake pads and spring together, slipping the pads back into the caliper. Put the screw back in that secures the pads in the caliper and put your wheels back on.
Essentially, you now have brand new brakes on your mountain bike, so you will need to bed them—check with your brake manufacturer for the correct process. Once bedded, go hit the trails.
Editors' Recommendations
- Snowboarding tips: Set your snowboard stance for a winter of shredding
- Ski and snowboard apparel brand Trew Gear crosses into the mountain bike world
- SJCAM C300 is an affordable action camera, but can it do what the Insta360 and GoPro can?
- Snowboard types, explained: All Mountain, freeride, freestyle, park, powder, and touring/splitboard
- Meet the U.S.’s oldest ski mountain, tucked away in Steamboat Springs, Colorado


