
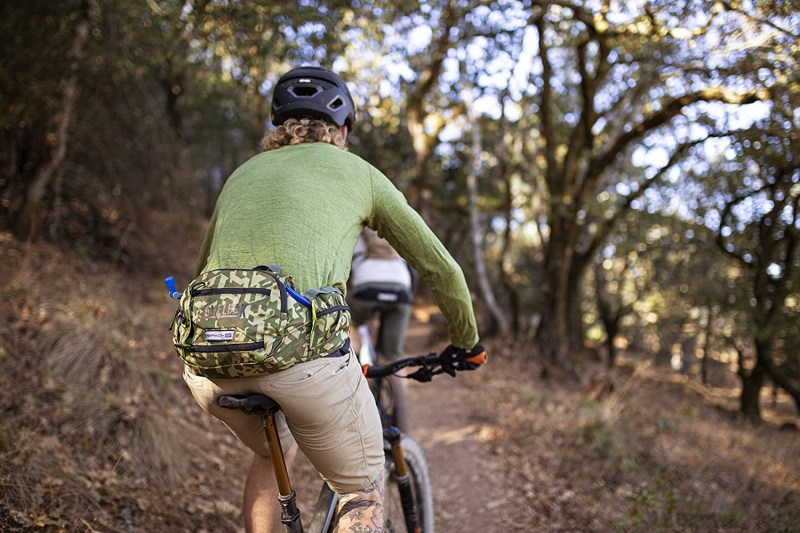
If you’ve been into mountain biking for a while, you know you should never hit the trail without a few key items. For most bikers (myself included), those items are trailside repair tools, a spare tube for flats, a snack for a mid-ride energy boost, and plenty of water. Up until last month, I always carried a lightweight day pack (preferably with a hydration bladder), but for this spring, I decided to try riding with a hip pack instead. Specifically, the Camelbak Repack LR4.
The Camelbak Repack LR4 is a padded hip pack designed specifically for mountain bikers, which features 2.5 liters of storage space, more pockets than your dad’s cargo shorts at the family barbeque, and (most importantly) an integrated 1.5-liter water bladder. After logging some long miles on local trails, the Repack LR4 has officially made a hip pack convert out of me. Here’s why.
What Is the Camelbak Repack LR4?
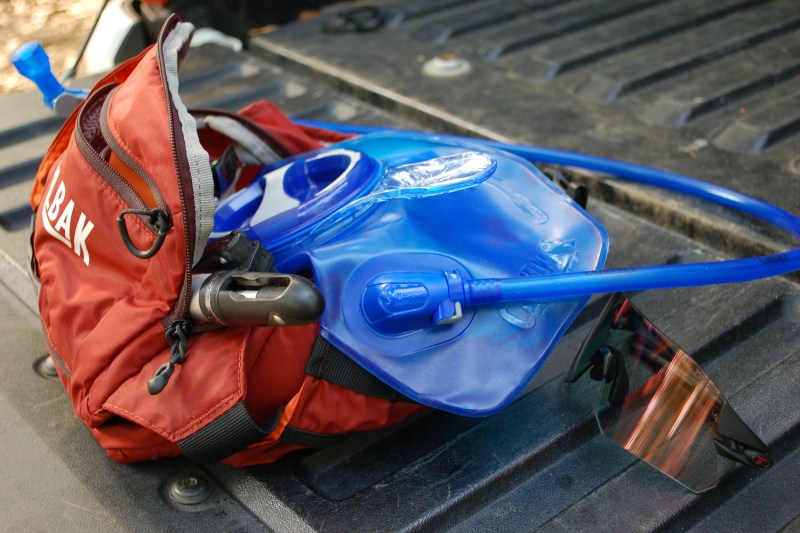
Simply put, the Repack LR4 is a hip pack (aka lumbar pack, aka bum bag) that specifically caters to mountain bikers like myself. It combines a supportive hip belt with tons of pockets for storage and organization. It also comes with an integrated water bladder that features a wrap-around drinking tube within easy reach at the rider’s waist.
The Repack LR4 is a smart choice for riders who need more than a simple water bottle or two out on the trail, but don’t feel like carrying a dedicated backpack either.
How Does the Camelbak Repack LR4 Work?
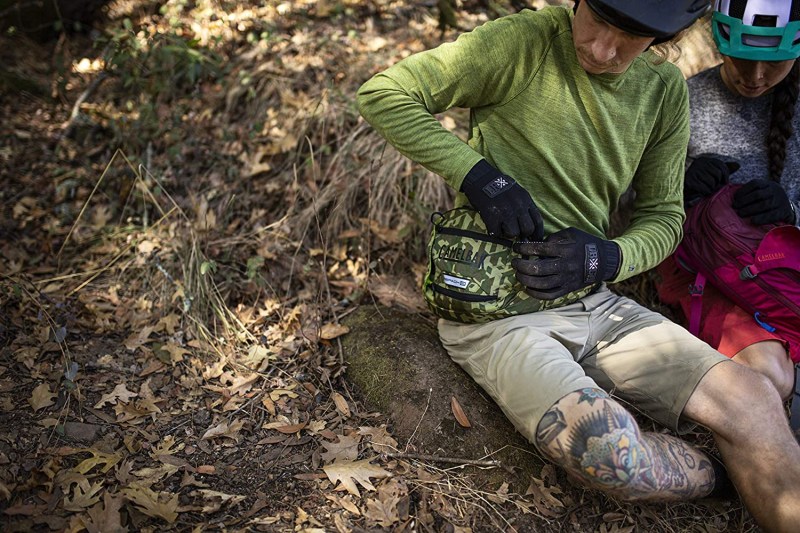
The Repack LR4 attaches to the rider’s waist using a thick nylon hip belt, then sinches down using a standard strap system similar to a backpacking pack. Hydration comes courtesy of Camelbak’s Crux hydration system, albeit in a 1.5L size that’s been reshaped to better fit the lumbar region of your back. The bladder’s drinking hose wraps around the rider’s waist and slots into a magnetic clip at the hip belt, which makes it easy to grab a sip on the go and quickly resecure the hose.
In addition to the integrated hydration bladder, Camelback worked four separate pockets into the Repack LR4’s design, which include a large main compartment beside the bladder, an outside accessory pocket with multiple compartments for organization, and two additional pockets on either side of the waist belt for easy access.
What Are the Features of the Camelbak Repack LR4?
- Load-bearing hip belt with added cargo pockets
- 1.5L Crux water reservoir system
- Magnetic trap tube keeps the drinking tube secure on the move
- Mesh padding along back and hip supports
- Rear pocket with integrated organizer for gear
- Reflective accents for added safety/visibility at night
- Adjustable compression straps fit 28- to 46-inch waists
What I Like About the Camelbak Repack LR4
- It’s Light and Comfortable – The Repack LR4 weighs in at just 11 ounces empty, making it one of the lighter packs on the market, especially among those with similar amounts of storage. The simple mesh padding that runs throughout the back and hip is all-day comfortable, even when the pack is loaded down with a full reservoir and all your essentials.
- The Crux Hydration Bladder Is Incredibly Easy To Drink From – If you’ve ever felt like you had to battle with a hydration pack for every sip, you’ll know what I’m talking about here. Camelbak’s Crux reservoir system has an outstanding flow rate and requires little more than a bite and gentle pull to get things moving. Add to that the convenience of the pack’s magnetic clip system, which makes grabbing and replacing the hose itself quick and easy on the move, and the Repack is an absolute joy to drink from.
- No More Back Sweat, No More Sore Shoulders – My main complaint when riding with a backpack is that there’s just no avoiding that river of sweat running down your back after a few miles, regardless of how well ventilated said pack may be. I was pleasantly surprised after my first ride with the Repack LR4 that I didn’t need to towel off my back before claiming into my truck for the sake of my seats. I’m also fairly smitten by what a difference moving all that weight down around my hips made at the end of the day. Before using the Camelbak I was convinced it was the aggressive riding position of my bike that made my upper body sore after a long ride. Now I know better.

What I Don’t Like About The Repack LR4
- The Bladder Itself Is Bulky – As much as I enjoyed using the Crux reservoir system, I was taken aback by how bulky it was inside the pack. Camelbak uses a large three-inch screw-on lid for the Repack LR4’s reservoir, and it noticeably infringes on the storage space inside the pack. Speaking of which…
- Total Storage is Somewhat Limited – All the pockets integrated into the Repack’s design make storing and organizing your gear easy, but once you’ve filled up the bladder itself, total cargo storage is limited to 2.5 liters of space. Granted that’s plenty for the minimum trail essentials I mentioned above, and I had no issue fitting a multitool, flat tire repair items (including a spare tube) snacks, and my phone into the pack, but I had to be more selective with my gear, and couldn’t fit my packable rain jacket into the Repack once everything else was inside.
- Ventilation Has Room for Improvement – When it comes to ventilation, lumbar packs like this are an absolute windfall compared to backpacks of any description, but I’d like to see a little more on the Repack. The light mesh padding breathes well enough on mild days, but out in the 80+ degree heat, it struggled to stay dry.
FAQs for the Camelback Repack LR4
I pooled the internet to dig up some of the most common questions like-minded buyers have about the Repack LR4 and tested each of them out myself in the field. Here’s what I found during my time with the Repack.
Does it Carry Enough Water for a Full Day’s Ride?
This depends on how long you typically ride for (surprise surprise) but I found the bladder’s 1.5-liter capacity ideal for about a three-hour ride. If you’ll be riding any longer than that, you’ll likely want to plan a refill along the way.
Does the Magnetic Clip Stay in Place?
I came across this question in a few places, and in my personal experience, I had no issues with the clip coming undone or losing pieces on the trail. I think some riders are making the mistake of pulling the hose out of the clip itself rather than simply disconnecting the magnetic portion, so just get used to the mechanism before going out on the trail and you shouldn’t have an issue.
Can the Hose be Disconnected From the Bladder?
In previous versions of the Repack, Camelbak used a hose system that didn’t include the quick disconnect commonly found in most packs. The Repack LR4 has since been updated, and now includes a quick disconnect at the bladder which makes refilling and removing the bladder for cleaning much easier.
Should You Buy the Camelbak Repack LR4 Hip Pack?
If you’re considering making the switch from either a backpack or a minimalist hip pack system, I think the Camelbak Repack LR4 is a smart buy. The Repack is comfortable on the hips, stays secure when riding, and features one of the easiest-drinking hydration systems I’ve used. Price-wise the Repack is a solid deal, especially when you consider the Crux hydration bladder is part of the package. There are packs out there with more storage and better ventilation if you’re willing to spend the money, but the Repack checks all my boxes for the essentials without being too hard on my wallet.


